
 mamies recipes
introduction
My name is Amilie Bourgoie, and I am passionate about creating meaningful experiences through creativity, dedication, and authenticity. Welcome to my world—a space shaped by purpose, continuous learning, and a genuine desire to share value with others.
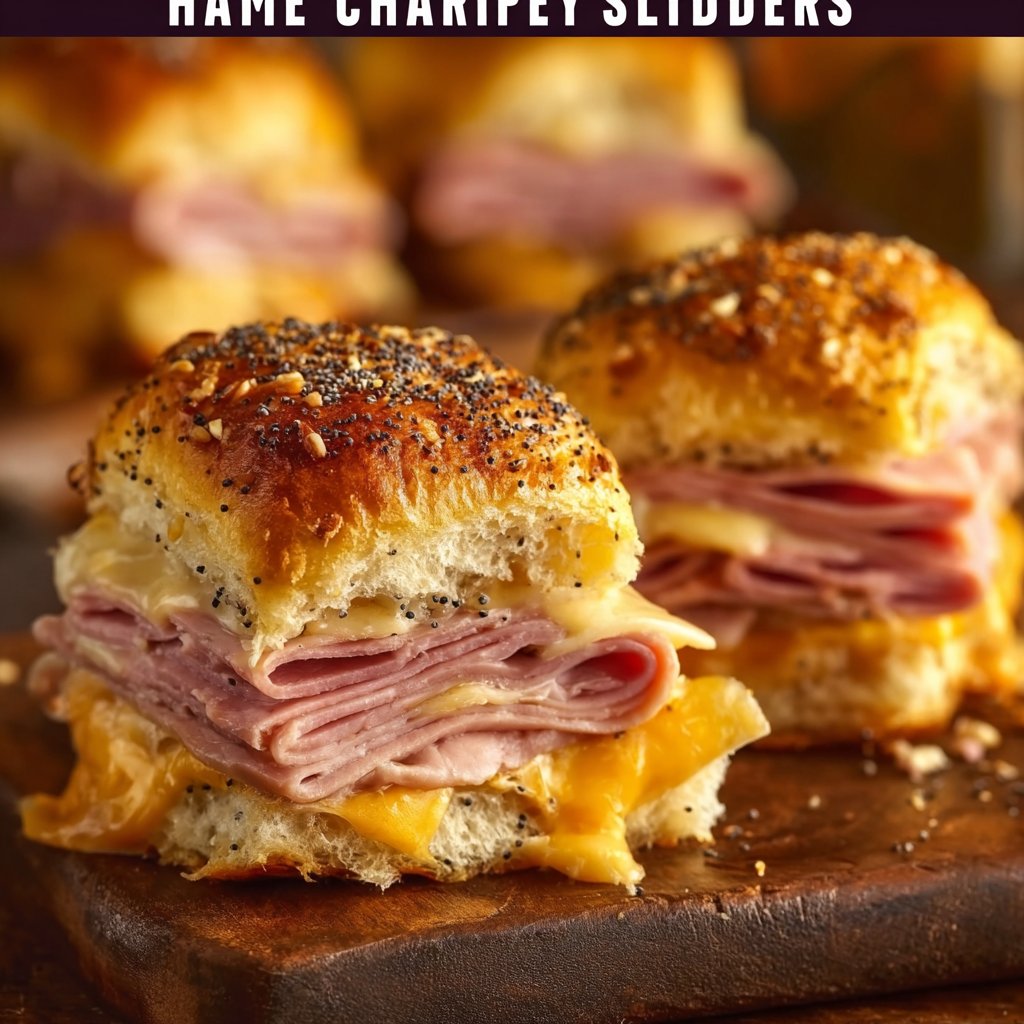
Today, I want to share a delightful and easy recipe that has become a family favorite: Ham and Cheese Sliders. This dish combines delicious layers of ham and Swiss cheese nestled between soft Hawaiian rolls and topped with a savory butter mixture.
It’s perfect for gatherings, quick weeknight dinners, or even as a party snack. Readers are in for a treat as I walk you through the steps to make these scrumptious sliders, along with tips, variations, and serving suggestions.
For more recipes follow me on Facebook and Pinterest.
Table of Contents
Table of Contents
why make this recipe
Ham and Cheese Sliders are an excellent choice for anyone looking to please a crowd with minimal effort. The taste is undeniably delicious, featuring the perfect combination of savory ham and melted cheese. Not only are they quick to prepare, but they also use simple ingredients that you may already have in your pantry. Whether you’re hosting a game day, a family gathering, or just want a comforting meal on a busy weekday, these sliders deliver on flavor and satisfaction.
Additionally, their versatility allows you to modify the recipe to cater to various tastes. You can experiment with different types of cheese or mustard, or even add vegetables for a fresh crunch. Perhaps you’re interested in another quick and easy option—check out this Cajun Sausage and Rice Skillet for a meal with a kick.
how to make Ham and Cheese Sliders
To create the perfect Ham and Cheese Sliders, begin by gathering your ingredients and equipment. Prepping is the key to a smooth cooking process. First, you’ll need to preheat your oven to 350°F (175°C). While that’s happening, slice your Hawaiian rolls in half and place the bottom halves in a baking dish. This will be the base for your delicious sliders.
Next, layer the ham and Swiss cheese evenly over the bottom half of the rolls. Make sure each slider is generously filled to ensure a flavorful bite every time. In a separate bowl, combine the melted butter, Dijon mustard, poppy seeds, and chopped onions. This mixture adds not only flavor but also a beautiful shine to the tops of the sliders.
Once mixed, pour the buttery mixture over the assembled sliders, covering them generously. Place the top halves of the rolls back on and, if you have any remaining butter mixture, brush it over the tops. Cover your baking dish with foil and bake for 15 minutes. After that, remove the foil and let them bake for an additional 10 minutes until the tops are golden brown and crispy. The texture should be soft and melt-in-your-mouth; just the way sliders should be.
For a delicious twist, you might consider adding a layer of spinach or jalapeños to the sliders. Incorporating these ingredients can elevate the traditional flavors. For another delightful sandwich option, try the Chicken Avocado Melt Sandwich.
Ingredients
- 12 Hawaiian rolls
- 8 slices of ham
- 8 slices of Swiss cheese
- 1/2 cup unsalted butter, melted
- 2 tablespoons Dijon mustard
- 1 tablespoon poppy seeds
- 1/4 cup chopped onions
Let’s talk about the ingredients. Each component plays a vital role in building flavors and textures. The Hawaiian rolls provide a sweet and soft base. Choosing quality ham and Swiss cheese will make a noticeable difference; try to select freshly sliced deli meats for the best taste. The butter sauce adds richness, while the poppy seeds and onions introduce a subtle crunch and taste contrast. Feel free to make swaps, such as using turkey or cheddar, to tailor the recipe to your preferences.
Directions
- Preheat the oven to 350°F (175°C).
- Slice the Hawaiian rolls in half and place the bottom halves in a baking dish.
- Layer the ham and cheese on the bottom half of the rolls.
- In a separate bowl, mix the melted butter, Dijon mustard, poppy seeds, and chopped onions.
- Pour the butter mixture over the assembled sliders.
- Place the top halves of the rolls on and brush with any remaining butter mixture.
- Cover with foil and bake for 15 minutes.
- Remove the foil and bake for an additional 10 minutes until the tops are golden brown.
- Serve warm.
For perfect results, ensure your butter is fully melted before mixing; this helps it distribute evenly over the rolls. Avoid overbaking, as this can dry out the sliders and affect their texture.
how to serve Ham and Cheese Sliders
When it comes to serving, these Ham and Cheese Sliders can be enjoyed on their own or paired with sides. They’re great with a fresh salad, crispy potato chips, or even a warm bowl of soup. Serving with dipping sauces, such as homemade ranch or honey mustard, can tempt those looking for a flavor boost. The soft, buttery texture of the slider contrasts beautifully with crunchy sides, achieving a balanced meal.

Make sure to serve them warm, as this enhances the melty cheese and overall flavor. If you’re looking to enhance this meal further, consider also preparing a Chicken Caesar Sandwich as a complementary dish.
how to store Ham and Cheese Sliders
If you have leftover sliders, storing them properly is crucial for maintaining their delicious taste. You can refrigerate the sliders for up to three days. Just make sure they are in an airtight container to prevent them from drying out. For longer storage, freezing is an option. Wrap the sliders individually in plastic wrap or aluminum foil before placing them in a freezer-safe bag. They can last for up to two months in the freezer.
To reheat, place the sliders in the oven at 350°F (175°C) for about 10-15 minutes, covering them with foil to retain moisture. If you’re in a hurry, you can microwave them; just be aware that they might not retain the same crispy texture.
tips to make Ham and Cheese Sliders
For the best results, consider these advanced tips. First, allow the sandwiches to sit for a few minutes before serving; this helps the cheese set a bit and makes them easier to handle. Experiment with the ratios of ham and cheese according to your taste preferences. If you prefer a kick, adding pickled jalapeños or a dash of hot sauce can elevate the flavor profile.
When brushing the butter mixture, ensure every surface is coated to achieve that wonderful golden top. If you’re feeling adventurous, try mixing in herbs, such as dried dill or oregano, to the butter mixture for extra flavor depth.
variation (if any)
There are many ways you can customize Ham and Cheese Sliders. Consider these variations:
- BBQ Sliders: Substitute ham with pulled pork and drizzle barbecue sauce for a Southern twist.
- Turkey and Cheddar: Swap the ham and Swiss for sliced turkey and cheddar cheese, adding a splash of cranberry sauce for a Thanksgiving flavor.
- Vegetarian Option: Use grilled vegetables, such as zucchini and peppers, as a filling for a fresh take.
- Spanish Style: Incorporate chorizo with manchego cheese for bold, Spanish-inspired sliders.
Each variation provides a unique flavor experience, making these sliders adaptable for various occasions.
FAQs
What type of rolls are best for Ham and Cheese Sliders?
Hawaiian rolls are ideal due to their sweetness and soft texture, but any soft slider or dinner roll can work with this recipe.
Can I make these sliders in advance?
Yes, you can assemble the sliders beforehand and store them in the refrigerator. Just bake them when you’re ready to serve.
What can I serve alongside Ham and Cheese Sliders?
Serving them with sides like coleslaw, chips, or a light salad works well. They also pair nicely with a dipping sauce.
Conclusion
In conclusion, Ham and Cheese Sliders offer a delightful blend of flavor and convenience, making them an ideal choice for any occasion. If you’re looking for more delicious options, be sure to check out other recipes such as the Ham and Cheese Sliders Recipe from The Kitchn, or take a look at Averie Cooks’ twist on this dish at Ham and Cheese Sliders on Hawaiian Rolls. For a broader selection, Allrecipes also features a great Baked Ham and Cheese Sliders Recipe.
Take a moment to gather your ingredients and try this scrumptious recipe today! You won’t be disappointed.

Ham and Cheese Sliders
- Total Time: 40 minutes
- Yield: 12 sliders 1x
- Diet: Non-Vegetarian
Description
These Ham and Cheese Sliders are a delightful combination of savory ham, melted Swiss cheese, and buttery Hawaiian rolls, perfect for gatherings or quick meals.
Ingredients
- 12 Hawaiian rolls
- 8 slices of ham
- 8 slices of Swiss cheese
- 1/2 cup unsalted butter, melted
- 2 tablespoons Dijon mustard
- 1 tablespoon poppy seeds
- 1/4 cup chopped onions
Instructions
- Preheat the oven to 350°F (175°C).
- Slice the Hawaiian rolls in half and place the bottom halves in a baking dish.
- Layer the ham and Swiss cheese on the bottom half of the rolls.
- In a separate bowl, mix the melted butter, Dijon mustard, poppy seeds, and chopped onions.
- Pour the butter mixture over the assembled sliders.
- Place the top halves of the rolls on and brush with any remaining butter mixture.
- Cover with foil and bake for 15 minutes.
- Remove the foil and bake for an additional 10 minutes until the tops are golden brown.
- Serve warm.
Notes
For best results, allow sandwiches to sit for a few minutes before serving. Store leftovers in an airtight container in the refrigerator for up to three days or freeze for longer storage.
- Prep Time: 15 minutes
- Cook Time: 25 minutes
- Category: Snacks
- Method: Baking
- Cuisine: American
Nutrition
- Serving Size: 1 slider
- Calories: 250
- Sugar: 2g
- Sodium: 500mg
- Fat: 15g
- Saturated Fat: 9g
- Unsaturated Fat: 4g
- Trans Fat: 0g
- Carbohydrates: 20g
- Fiber: 1g
- Protein: 7g
- Cholesterol: 30mg